Web Services
The administration of Web Services is aided by a software package called phpCOIN. It will automatically raise invoices and email them out as required.
Note I've not provided a link to phpCOIN to reduce the attention of hackers. If you need it ask me for the URL.
Administrator Login
The client and administrator logins are different.
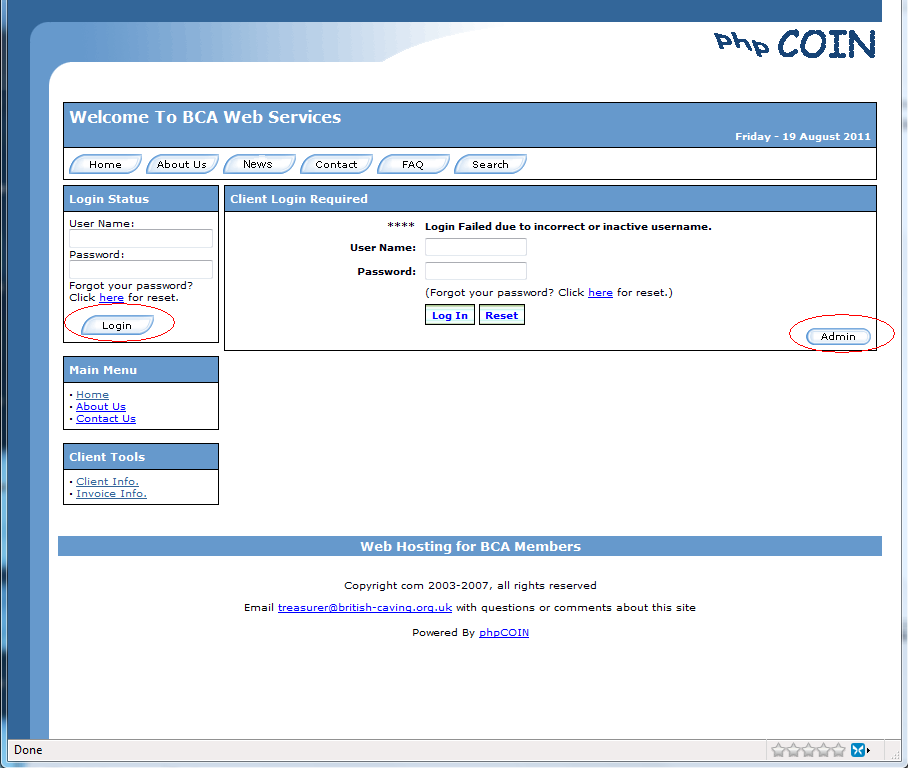
- Use you internet browser to go to the home page.
- Click on the Login Button
- Click on the Admin Button (Note if you don't do this you will attempt to login as a client, which is wrong)
- Enter your login details
- Click on the Login Button
Banking a Cheque
Recording on Daybook
A Daybook is to be kept in Excel.
- A copy of the Daybook should be emailed to the Web Services Manager at the end of each day any entries are made.
- The Daybook should be sub-totalled by banking date which should match the entry on the bank statement.
- The daybook looks like this:
Banking on phpCOIN
When a cheque is received it needs to be posted against the corresponding invoice(s).
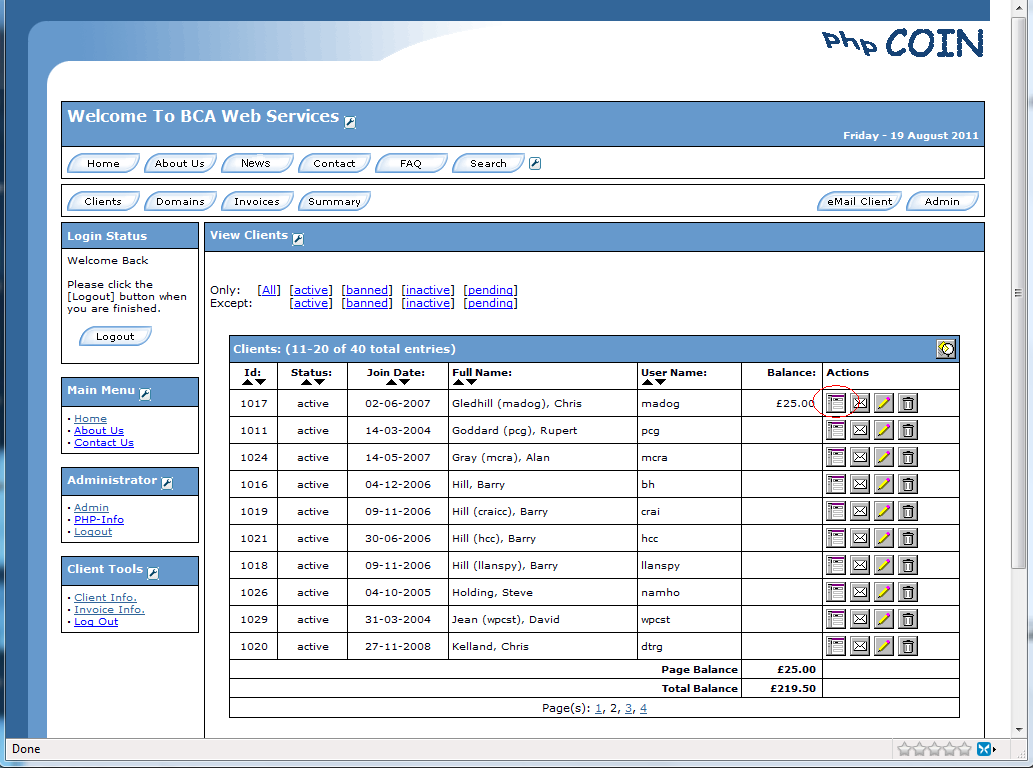
- Click on the Client Button
- This will list all the clients.
- Click through the pages until you reach the appropriate client.
- By clicking the heading you can sort the list - which might help.
- Note the user name.
- In this example we are going to pay the £25 invoice for Chris Gledhill (user madog).
- Click on the Page icon.
- You will see the Client Page listing all the invoices etc.
- Find the line for the invoice you need to pay.
- The invoice number is in the first column.
- Check the balance is not zero.
- If the invoice has already been paid there will be a zero on the balance column.
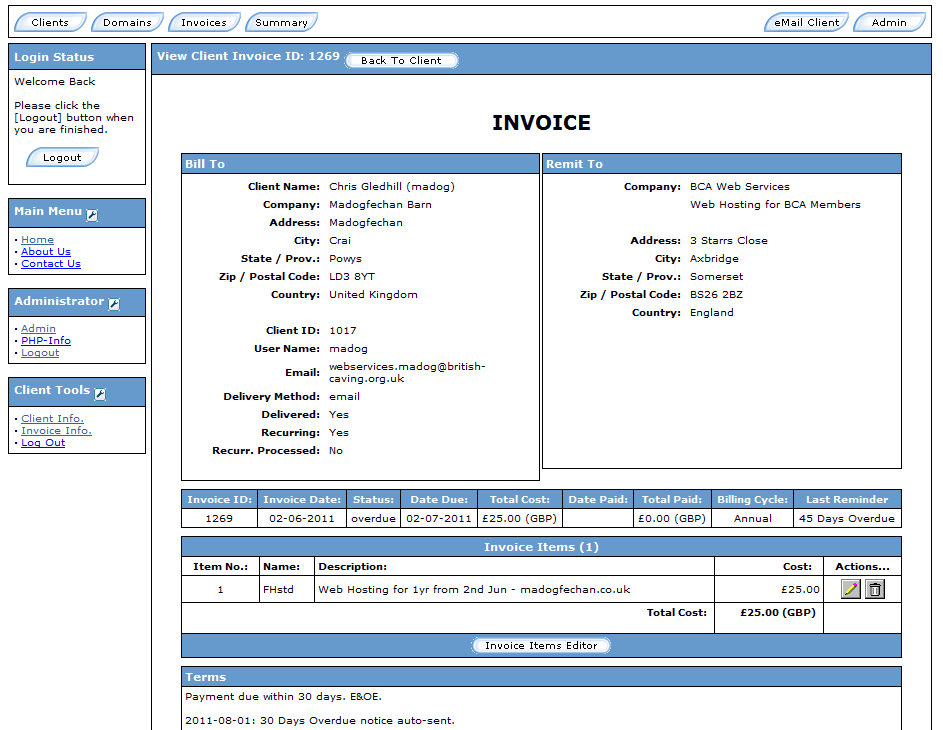
- Click on the Page icon on the appropriate line.
- You will see the invoice page.
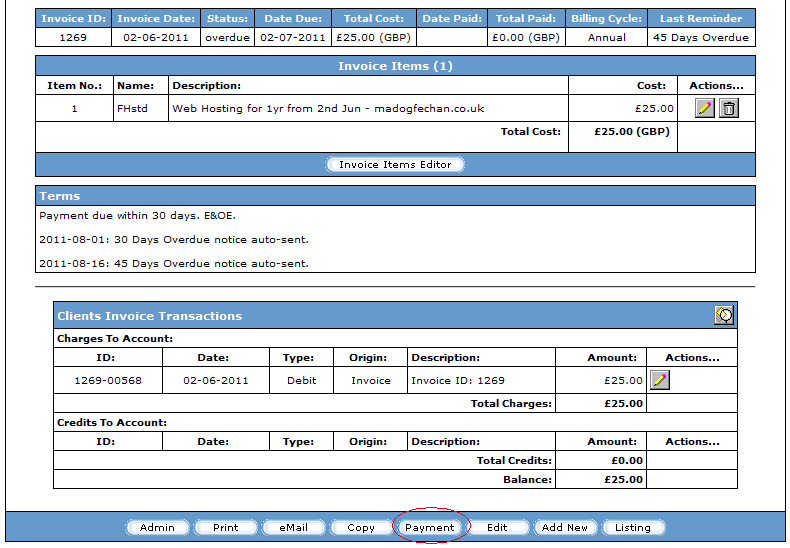
- And here is the bottom half of the page.
- If all looks correct click on the Payment Button.
- If possible double-check that payment is for the correct domain (eg madogfechan.co.uk). One client can have several domains.
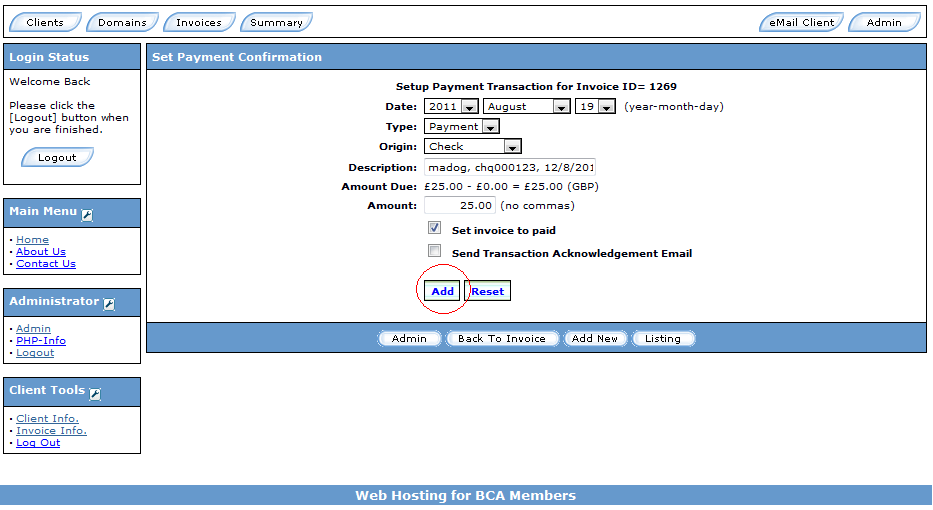
- You will see the payment screen.
- Date: The date the payment is entered on the system - i.e. today.
- Type: Leave as “payment”.
- Origin: Changed to “Check” (sorry American spelling of “Cheque”)
- Description: Enter the User Name, Cheque Number, Cheque Date, Payee - if different from the client.
- Amount: Enter the amount being paid.
- Set invoice to paid: Tick
- Send Acknowledgement: Tick if an email acknowledgement or receipt has been requested - normally not.
- Click the Add Button
- Job Done.
- The bottom of the Invoice Page will show the payment you have just made. It will allow you to edit it, click the pencil icon, if it needs correcting.
